> ## Documentation Index
> Fetch the complete documentation index at: https://docs.cogniagent.ai/llms.txt
> Use this file to discover all available pages before exploring further.
# Widget channel
> Embed a chat widget on your website so visitors can talk to your conversation flow.
The **Widget** is the simplest channel to set up. No integrations to connect, no credentials to manage — just paste a snippet of code on your site and your flow has a fully working chat surface.
## When to use it
* Visitors should be able to chat without logging in.
* You want a branded chat bubble on your marketing site or in-app.
* You want voice support (optional) alongside text.
## 1. Add the Widget channel
Open the flow, click **Flow settings** in the bottom toolbar, then the **Channels** tab. Click **Add Channel** and pick **Widget**.
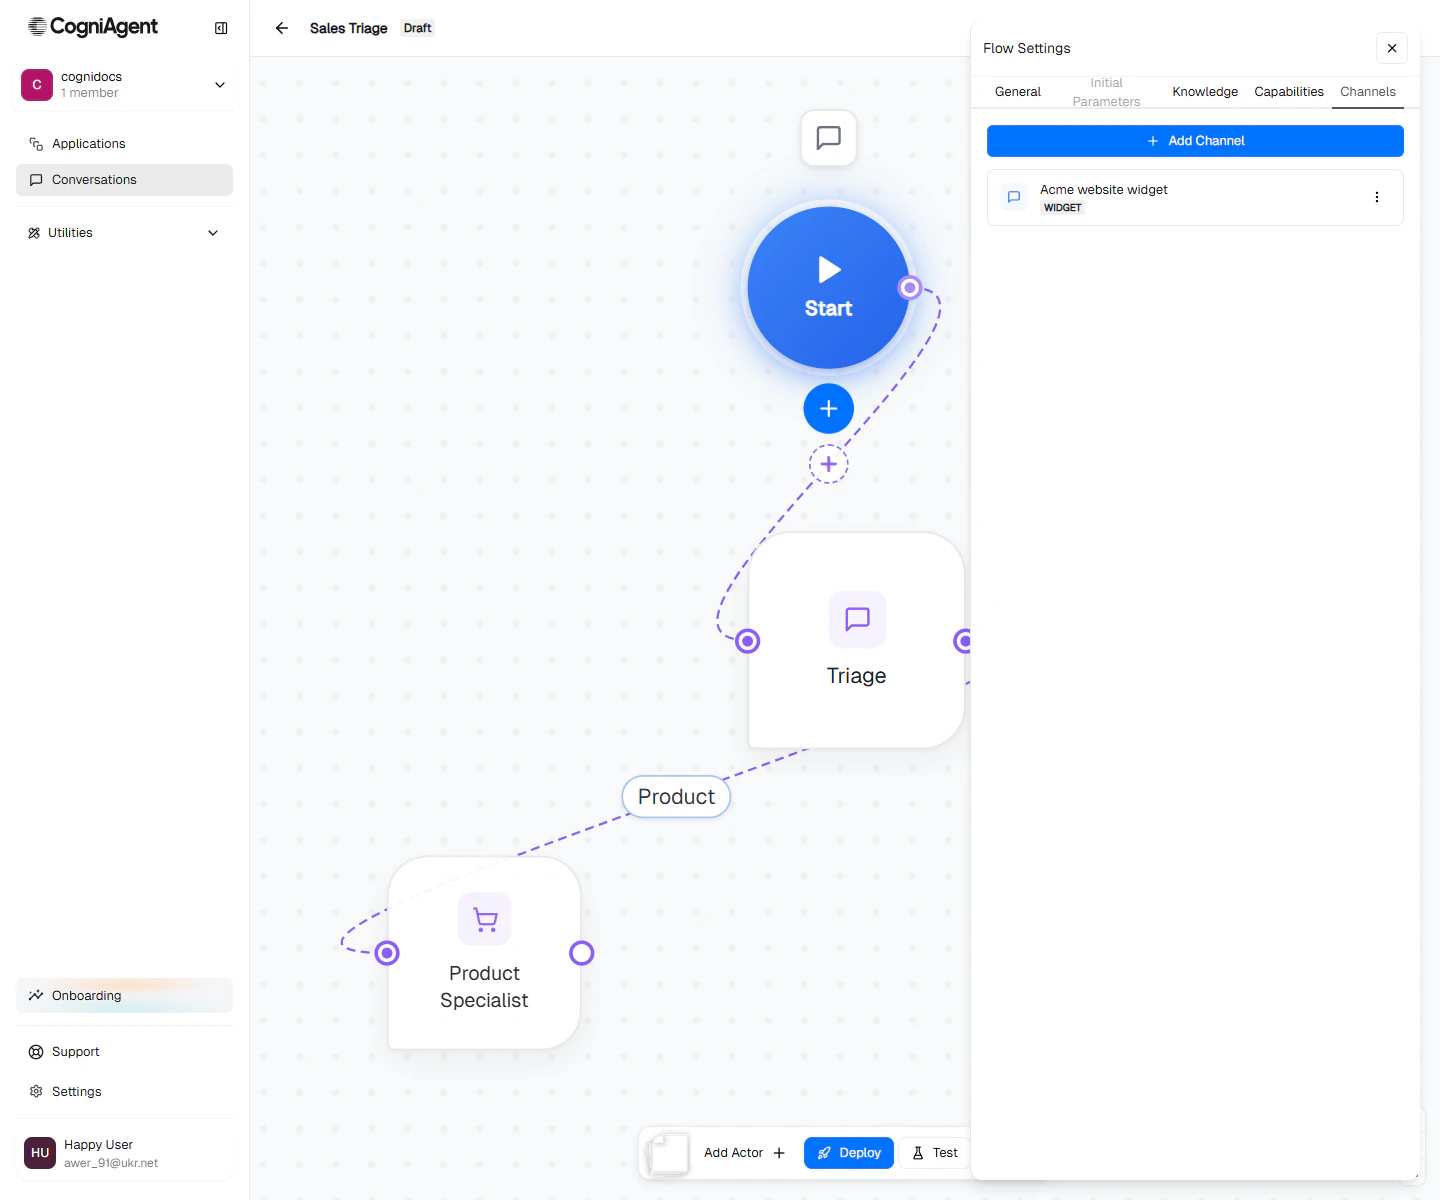 Click the channel row to open its configuration drawer.
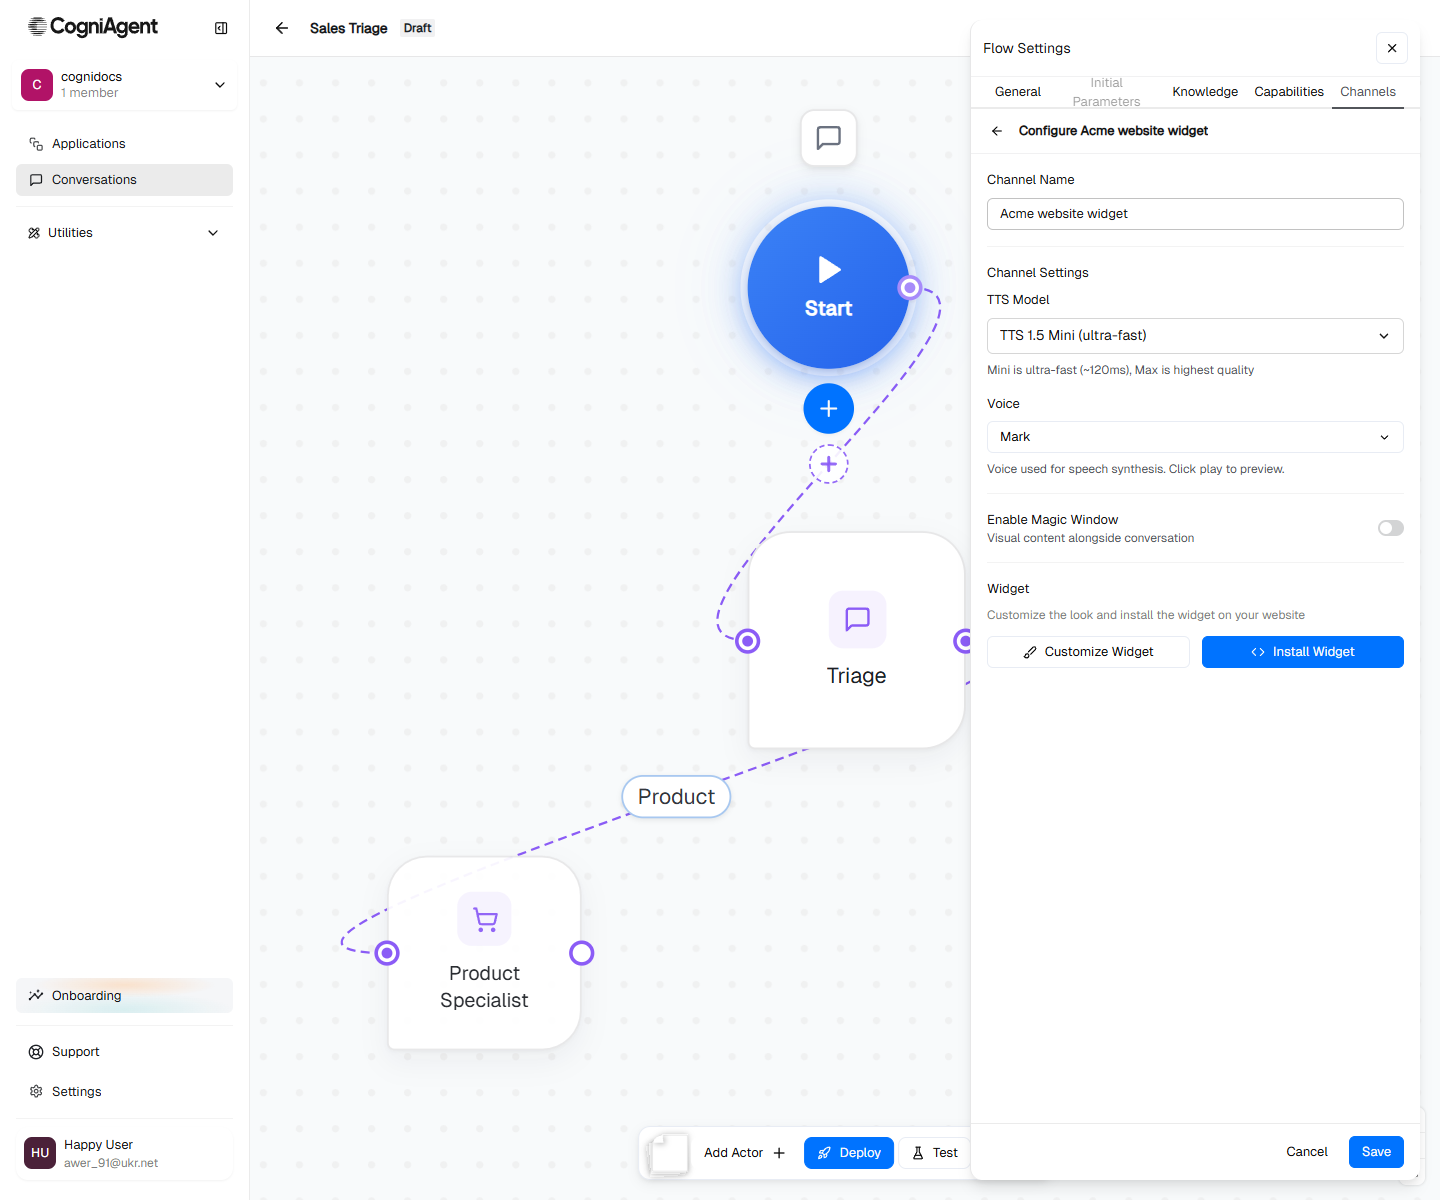 | Setting | What it controls |
| ----------------------- | ----------------------------------------------------------------------------------------------- |
| **Channel Name** | Internal label (e.g. "Acme website widget"). Visitors never see it. |
| **TTS Model** | The text-to-speech model used for voice replies. *Mini* is \~120ms; *Max* is highest quality. |
| **Voice** | Which voice the widget uses when speaking. Click to preview. |
| **Enable Magic Window** | When on, the widget shows visual content (cards, images, structured panels) alongside the chat. |
Click **Save** to persist these. The two buttons below — **Customize Widget** and **Install Widget** — are covered next.
## 2. Customize the widget
Click **Customize Widget** to open the appearance dialog.
| Setting | What it controls |
| ----------------------- | ----------------------------------------------------------------------------------------------- |
| **Channel Name** | Internal label (e.g. "Acme website widget"). Visitors never see it. |
| **TTS Model** | The text-to-speech model used for voice replies. *Mini* is \~120ms; *Max* is highest quality. |
| **Voice** | Which voice the widget uses when speaking. Click to preview. |
| **Enable Magic Window** | When on, the widget shows visual content (cards, images, structured panels) alongside the chat. |
Click **Save** to persist these. The two buttons below — **Customize Widget** and **Install Widget** — are covered next.
## 2. Customize the widget
Click **Customize Widget** to open the appearance dialog.
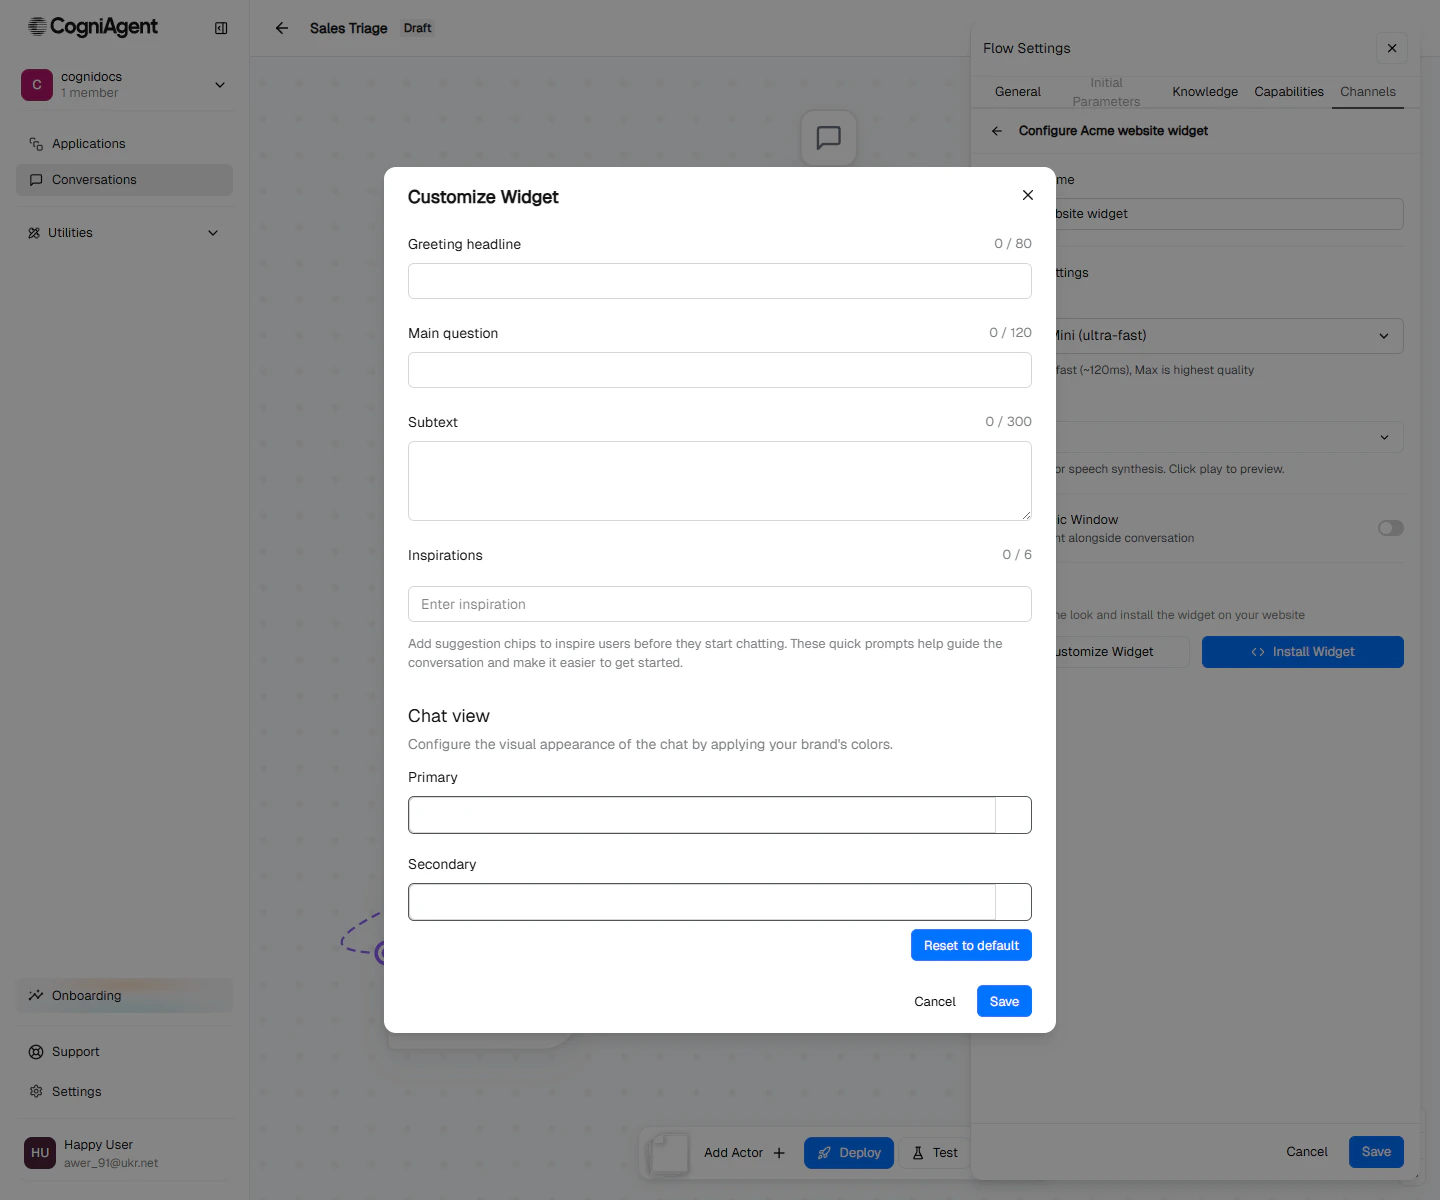 | Field | What it does |
| --------------------- | --------------------------------------------------------------------------------------------------------- |
| **Greeting headline** | The first thing a visitor sees when the widget opens. Short (max 80 chars). |
| **Main question** | The big prompt under the greeting, e.g. *"How can I help you today?"* (max 120). |
| **Subtext** | One line of supporting copy under the main question (max 300). |
| **Inspirations** | Up to **6** suggestion chips that pre-fill common prompts. Lowers the bar for visitors to start chatting. |
| **Primary color** | Your brand color — used on the launcher button, send button, and accents. |
| **Secondary color** | Used for hover states, chip borders, and secondary UI. |
Good inspiration chips read like real questions, not topics. *"How much does Acme Pro cost?"* converts better than *"Pricing"*.
Click **Save** when you're done.
## 3. Install on your site
Click **Install Widget** to get the embed snippet for your website.
| Field | What it does |
| --------------------- | --------------------------------------------------------------------------------------------------------- |
| **Greeting headline** | The first thing a visitor sees when the widget opens. Short (max 80 chars). |
| **Main question** | The big prompt under the greeting, e.g. *"How can I help you today?"* (max 120). |
| **Subtext** | One line of supporting copy under the main question (max 300). |
| **Inspirations** | Up to **6** suggestion chips that pre-fill common prompts. Lowers the bar for visitors to start chatting. |
| **Primary color** | Your brand color — used on the launcher button, send button, and accents. |
| **Secondary color** | Used for hover states, chip borders, and secondary UI. |
Good inspiration chips read like real questions, not topics. *"How much does Acme Pro cost?"* converts better than *"Pricing"*.
Click **Save** when you're done.
## 3. Install on your site
Click **Install Widget** to get the embed snippet for your website.
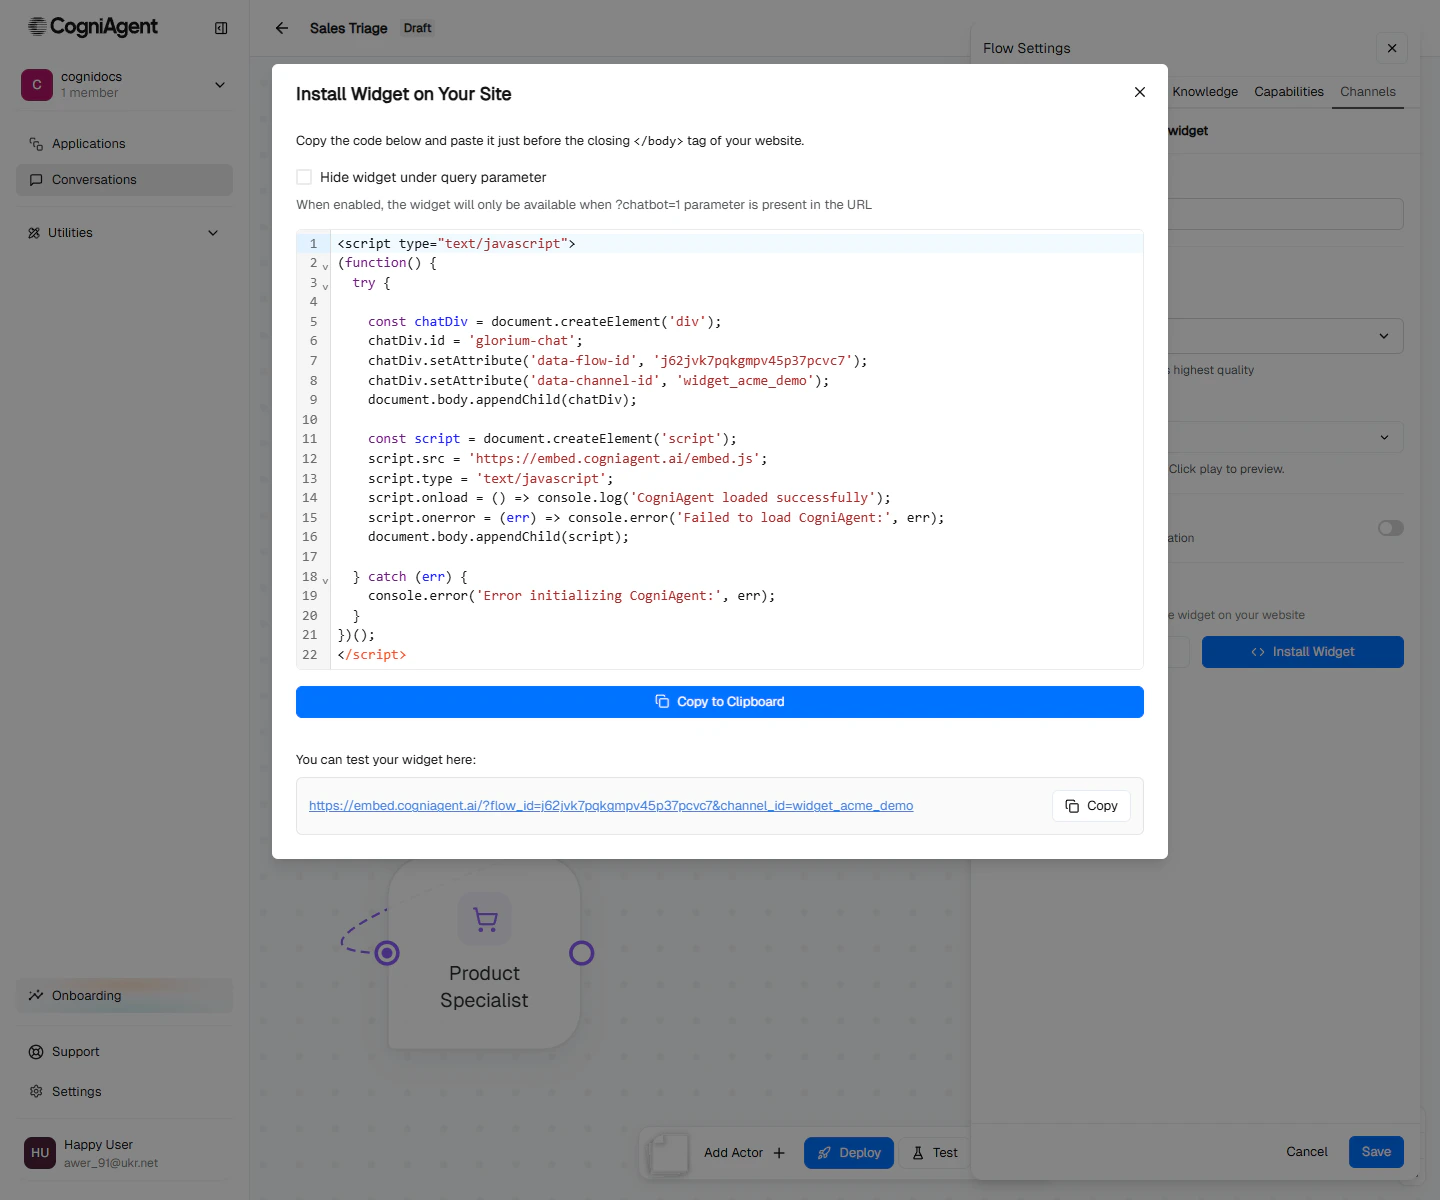 Copy the snippet and paste it into your site's HTML, right before the closing `` tag. It looks like this (the `data-flow-id` and `data-channel-id` are pre-filled for your flow):
```html theme={null}
Copy the snippet and paste it into your site's HTML, right before the closing `` tag. It looks like this (the `data-flow-id` and `data-channel-id` are pre-filled for your flow):
```html theme={null}