
Three Types of Nodes
CogniAgent has three types of nodes, each with a different job:Triggers
Start your workflow. Like an alarm clock that kicks things off - when an email arrives, when a form is submitted, or at a scheduled time.
Actions
Do the work. Send emails, ask AI to analyze text, update spreadsheets, or post messages to Slack.
Logic
Make decisions. Choose different paths based on conditions - like “if the email is urgent, do this; otherwise, do that.”
How Nodes Work Together
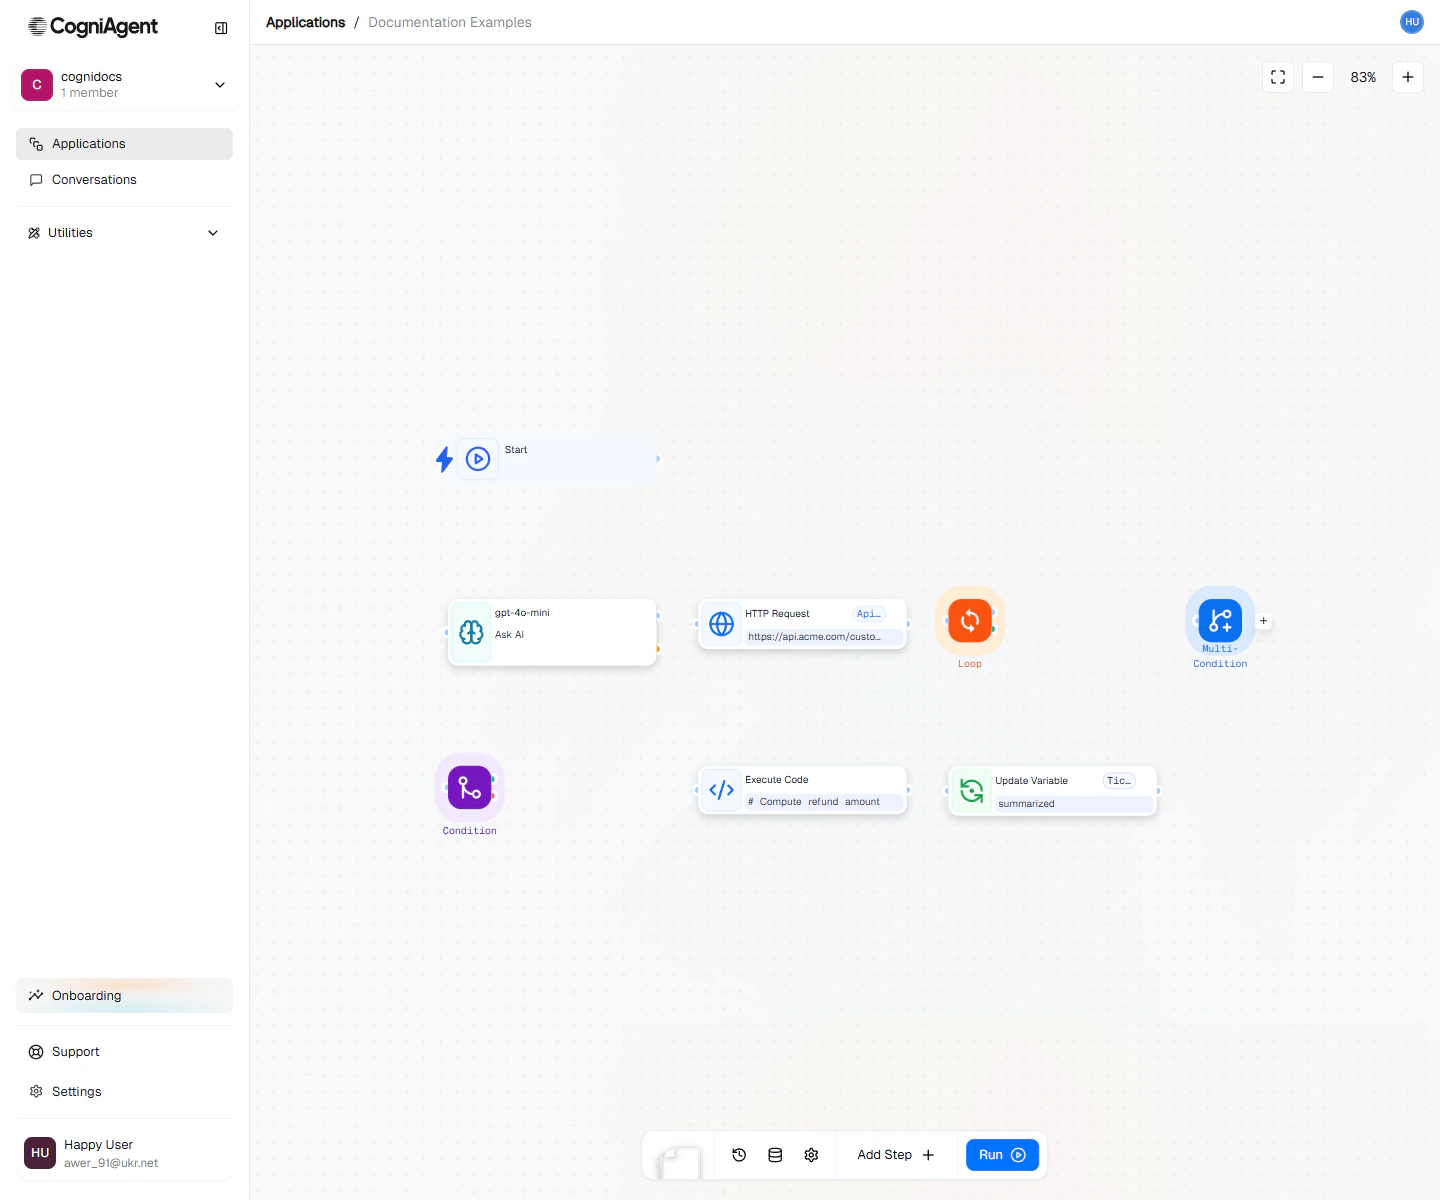
A workflow built from triggers, actions, and logic — connected on the canvas.
- Trigger nodes kick things off and bring in the initial information
- Action nodes do things with that information
- Logic nodes decide what happens next based on rules you set
Passing Information Between Nodes
Every node can use information from nodes that came before it. You use a simple format to grab that data:What Every Node Has
All nodes share these basic parts:Settings
- Name - What you call it (shown on the canvas so you can remember what it does)
- Key - A short code used behind the scenes (auto-created, but you can change it)
- Description - Optional notes for yourself about what this step does
Connection Points
- Left side - Where lines from previous nodes connect
- Right side - Where lines to the next nodes connect
Trigger nodes only have a right-side connection since they’re always first. Some decision nodes (like Condition) have multiple outputs for different paths.
Configuration Panel
Click any node to see its settings on the right side of the screen. This is where you tell the node exactly what to do.Node Status Colors
When your workflow runs, nodes show their status with colors:Next Steps
Trigger Nodes
Learn about workflow triggers
Action Nodes
Explore what your workflows can do
Logic Nodes
Master workflow logic and branching
Build a Workflow
Follow a hands-on tutorial