
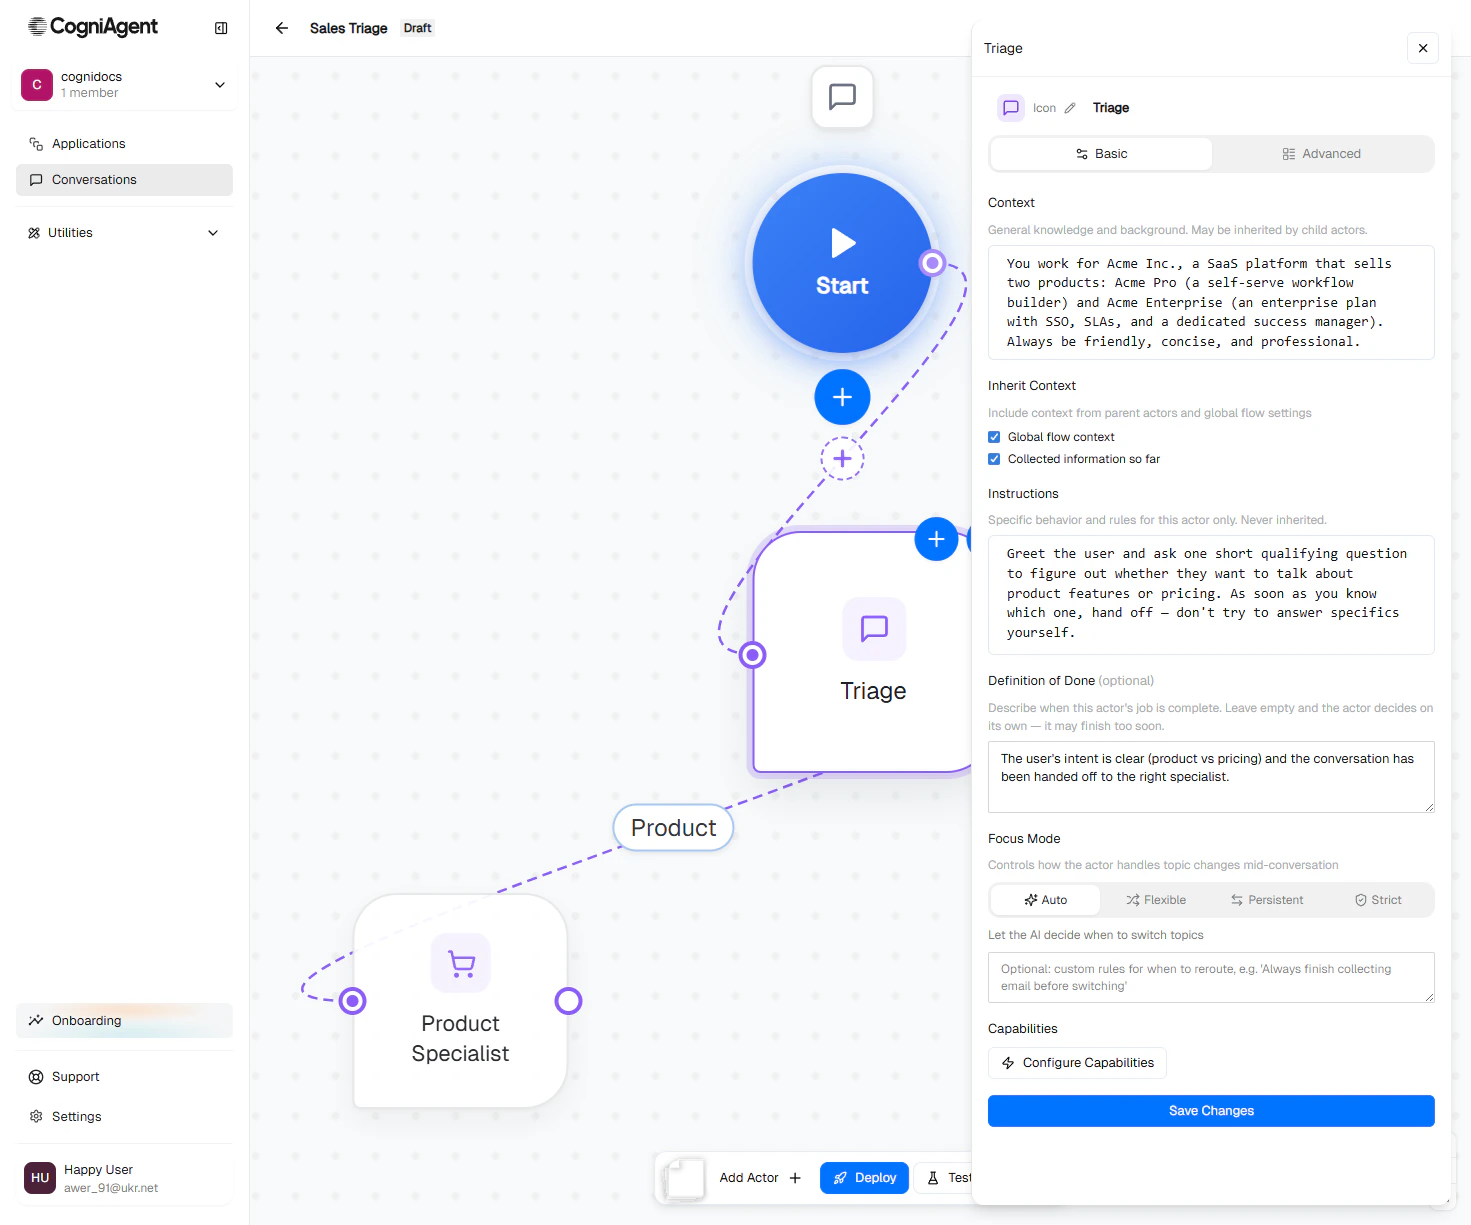
The actor config panel with all fields populated.
Name and icon
At the top of the panel:- Icon — Click the icon to pick from a Lucide icon library. The platform also auto-suggests an icon based on the actor’s name and context. You can change it any time.
- Name — Short and descriptive. Appears on the canvas and in conversation transcripts as the “speaker”. Good:
Pricing Specialist,Returns Intake,Tier 2 Support. Bad:Agent A,Bot.
Basic tab — the four main fields
Context
Background knowledge the actor needs. Inheritable by children. See Context and inheritance for the full story.Inherit Context
Checkboxes that let this actor opt into upstream context:- Global flow context — the
globalContextfrom Flow settings. - <Each ancestor actor> — any actor that routes into this one.
- Collected information so far — slot summary (default: on). See slots.
Instructions
What this specific actor should do. Private — never inherited by children.Definition of Done
A short rule for when the actor’s job is complete.Focus Mode
Auto / Flexible / Persistent / Strict. Controls how strictly the actor sticks to its job when users change topics. Default is Auto. See Focus modes for the deep dive.Capabilities
Click Configure Capabilities to open the capabilities drawer, where you wire up:- Knowledge bases — give the actor search access to your documents.
- Integrations — let the actor send Slack messages, send Gmail emails, look up Shopify orders, etc.
- Custom tools — run Python, call a workflow, hit an HTTP endpoint.
Advanced tab — the step builder
The Basic tab gives you a free-form actor — one that thinks and replies turn by turn, deciding what to say based on its prompt. The Advanced tab adds a step builder below the basic fields. There you can scripted the actor’s behaviour step by step:Save changes
Click Save Changes at the bottom of the panel. Changes are picked up on the actor’s next turn — you can edit a deployed actor’s prompt mid-conversation and the next reply will reflect the change.Delete an actor
Click the actor, then either:- Use the trash icon that appears when the actor is selected.
- Press Delete on your keyboard.
Anti-patterns
Next
Routing edges
Connect actors and define when handoffs happen.
Capabilities
Give the actor knowledge, integrations, and custom tools.
Step builder
Script an actor’s behaviour step by step.
Flow settings
Configure flow-wide context, knowledge, and integrations.